Lyin’ on the Couch Watching Oprah

Just another WordPress.com weblog

Making a Quilt! August 29, 2010

Filed under: sewing — stephres @ 8:07 pm
Tags: , , ,

I have always been a little scared of tackling a quilt but I had an idea in my head so after thinking about it for a few months I decided to go for it. Yes, it sometimes takes me months to decide to do something but once I decided I finished in a weekend (thanks Tom for taking the kids to the beach so I could finish uninterrupted).

Megan wanted to update her room from the nursery, which I thought was fair since she was 7 years old. She picked a bed in a bag set from Target and that’s where we started. The problem was the comforter was so thick and hot it was not useful for a little girl’s bedroom in Florida. I tried to fold it down at the end of the daybed but it so bulky that didn’t work either.

I decided if I cut it up I could make a quilt. But I was scared to make a quilt (see, that’s what took the months of thinking!). I decided to do a rag quilt. I had made lap rag quilts for the kid for Christmas and they are cute and cuddly without being to thick.

Thanks Jacob and Scrappy for modeling it!

I bought flannel for the back and started cutting squares 14 x 14 inches. I cut up the comforter, quilter’s cotton and the curtains Megan picked out to match that were too long for the front and flannel for the back.  Oh, here are the curtains, cute right? I sewed black out fabric to the back and cut them to cafe length so we could put her little toy baskets under the window.

The black out fabric is not blacking out! Megan’s favorite part: lavender sparkly finials. Found them at Lowes!

I cut 35 squares for each side (the quilt is 7 by 5 squares for a twin size). Then I sewed the cotton side to the flannel side. I tried to vary the way I stitched them together: I did an x on some, a plus sign on others and lines running diagonal on the rest. It kept things interesting because I was getting a little frustrated at how long this project was taking (and I also went to JoAnn’s twice because I ran out of fabric).

After I had all the squares ready, I just sewed them together to make lines of 5 squares across. I sewed cotton side to cotton side so the raggy side would be on the flannel side.

For the binding, I cut strips of flannel and sewed it around the cotton side and then flipped it around to the flannel side and stitched in the ditch all the way around.

After all the sewing, I had to cut, cut, cut! I cut little slits all the way around the binding and seams on the flannel side. Then I washed it.

Megan loves the finished project and I love that she can actually use it at night! 


Booster Seat Cover July 3, 2010

Filed under: sewing — stephres @ 2:31 am
Tags: , , , ,

I have never been noted as the most observant mother but I did recently notice that Megan’s booster seat had seen better days.

Florida law recommends all children under 80 pounds and 4’9″ tall be in at least a booster seat. So Megan will probably be in this seat for a little while anyway. I let her pick out some fabric and we experimented until I figured out how to duplicate the seat cover. Basically I cut up the old one and traced it to make a pattern. I did take some measurements so if you have a Graco backless booster you can use them to make one for yourself!

For this project you will need: about a half yard of cover fabric (I used flannel), a half yard of lining fabric (I used an old towel), fleece for padding and 1/4 inch elastic. I used scraps from old projects and it worked out great. I actually made four of these with my fooling around so I hope I have some tips that will save you time and frustration!

I basically drew two intersecting rectangles from the existing cover. I included the measurements below. You can round off the edges to make it more like the existing cover. You can download the measurements here:

boosterpattern

The pattern is NOT 100%. You need to draw your own rectangles using those measurements. I had to reduce it to fit on one page so if you use them as-is you will get a teeny tiny booster seat cover!

Cut out the top fabric. To save some time and aggravation, lay the top fabric on top of the lining fabric, right sides together and pin. That way when you cut out the lining fabric they are all pinned together and ready to go. For the lining I decided to use an old ripped beach towel so I could turn it over when we were coming home from the beach. The cover is reversible so use whatever lining you would like!

I added the elastic at this point. You need two pieces 5 1/2″ long for the top and one 18″ long for the middle. Pin the short loops sandwiched in between the cover and lining fabric at each top corner.

Pin the long elastic at the middle of the side piece (the short rectangle). Cut out the lining fabric when you done pinning all the way around. You can baste the elastic into place if you would like.

Cut a rectangle of fleece 11″ by 16 1/2″. Pin this to the middle of the cover on the top.

Sew! Sew 1/4″ around the cover. Start at the side piece that does not have the elastic pinned to it. Leave the side piece open to turn it rightside-out. Sew all around, going over the elastic twice (forward, backstitch and then on again).

Clip your corners and curves. I used pinking shears and just trimmed all the way around.

Turn it rightside-out and press. Be very careful, it will be difficult to pull it through the small home, so don’t rip it! Push out all the corners with a stick or your fingers and press it flat.

Topstitch all the way around, except for the open side. That way if you ripped any of the side stitching on the small rectangle you can get it closed again. The towel unravels quickly if you don’t watch it!

Cut the corners on the open side and tuck in the raw edges. Bring the long piece of elastic around from the other side and tuck in. Stitch the side closed, going over the elastic three times (forward, backstitch and then on again).

To attach, run the elastic on the hooks on the bottom of the booster seat and loop the long piece around the bottom. Look: it’s my helper!

It is reversible, so we can turn it over when we are coming home from the beach.

That’s it! Now I have a little booster seat cover that is reversible, cute and easily washable. Hope you make one too!

ps Some of you might remember the four legged helper who is interested in all sewing projects. Well, Megan got another four legged helper for her birthday who is ten times worse: this one can jump on the table! She has dragged serger thread all throughout the house and knocked pins, patterns and rulers clear off the table! Don’t let this cute face fool you: she is devious! 


Swing Top Revision April 14, 2010

Filed under: sewing — stephres @ 4:17 am
Tags: , , , ,

I love the Emma swing top, but I have always thought I would love it a bit more without the open back. So I fiddled around this weekend when I had some time and this is what I came up with:

It was not that hard so you can do it too, I promise!

Material needed: Emma Swing Top Pattern (available from youcanmakethis.com) and fabric amounts instructed in pattern, 3/4 inch elastic

The first step is to cut out the pattern pieces. Cut out the front and lining, band, ruffles, straps and front contrast and front contrast lining as normal. For the back, measure your munchkin from armpit to armpit to get a back measurement (or measure all around and then divide by 2). Now take your back measurement and multiply by 1 1/2. Take your back piece and extend it. Megan’s back is 12 inches so I multiplied by 1 1/2 and got 18. So I extended the back piece so the top would be 9 inches (remember you are cutting on a fold).


Now cut out a back contrast piece and back contrast lining piece that same length as your back piece. The width should be the same as your front contrast pieces. I cut out the back contrast piece 1 3/4 x 9 inches and the back contrast lining piece 2 x 9 inches.

Now put the top together by the directions. You will have to fiddle around to decide where the straps go in the back, I put them in 4 1/2 inches from the sides because that looked about right. You want them more in the middle than on the side. When you attach the contrast piece to the top, make a gap in the sewing at each side. Decide how long you want the back elastic. I made mine 8 inches. Insert the elastic with a safety-pin and attach at each seam. Sew your gaps closed in the contrast and you are done!

Hope this helped! This is a cute little summer top that is very versatile so I hope I made it little more modest.


Monkeying Around July 15, 2009

Filed under: sewing — stephres @ 1:12 am
Tags: , , , , , , ,

If there is one thing Megan loves more than her little toys, it is places to put her little toys. She probably has over a dozen little purses and bags and uses them all. She has a purse for her costume jewelery, her little pets, her coins, etc. Most of her bags are mommy-made and I think she prefers them that way. It is a quick and easy project.

I start with some clip art. Today I am making a monkey purse so I found a cute round monkey head:

The monkey needs a seam allowance, so I marked at 1/4 inch out and then connected the dots.

Here is the monkey head all ready to be cut out:

Cut out two pieces of fabric for the front and back. I traced the monkey’s face and ears onto cream corduroy but you could use a light box of hold it up to a window to trace:

I used a black fabric marker to draw on his face. Of course you could sew but I wanted to keep this quick and easy!

Sew on his face and ears with a satin stitch. Before I cut them out, I ironed on Heat n Bond Lite so I could iron them in place before I sewed.

I went and got an old purse and measured how long the strap was (18 inches) and then cut out one strip 18 by 3 inches. I ironed the raw edges inward a tiny bit and then folded in half and sewed up both long ends. Very easy!

Baste the strap to his ears. I think in hindsight, the strap should have been closer to the top!

I pinned the monkey together and sewed around, measuring exactly where I stopped and started at his head so I can sew the lining the same way.

Here is where I opine the virtues of pinking shears. I LOVE my pinking shears. In normal patterns, this is where the instructions would tell you to clip all the rounded parts (which is the entire thing, since his head is completely round). I find it much easier to trim close to the stitching with my pinking shears. And look how cute it is!

Yes, I realize no one will see it once it’s all together. But I know it’s cute!

Ok, now do the same steps with the lining. Add a closure before sewing, but it is not necessary for a child’s purse. Leave a 2-3 inch gap in the bottom so you can turn it inside out. With your monkey right-side out and your lining inside out, pin the right sides of the opening together.

Sew the top of the purse, pull the purse through the hole in the bottom of the lining and push out the edges with your fingers. Sew the hole closed with a zig zag stitch or slip stitch by hand and push it in the purse. You can topstitch if you would like. Isn’t it cute?

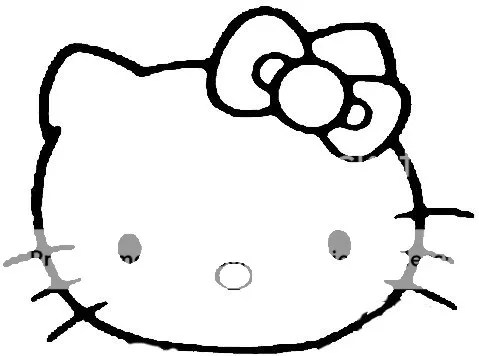
I made the monkey purse for a friend, so I made a Hello Kitty purse for Megan. Here is the template I used, but if you google “Hello Kitty Coloring Page” you can find a bunch:

And here is the finished purse. I cut the eyes, nose and whiskers out of felt and hand sewed them on. The eyes and nose were attached before I sewed everything together and the whiskers after the purse was completed. I added the bow in the lining fabric afterward and sewed it on.

She likes it!


Elastic Backed Shorts June 24, 2009

Filed under: sewing — stephres @ 7:02 pm
Tags: , , , ,

I think what I love the most about making Megan’s clothes is that she actually gets clothes that fit. I love that I can customize the outfits for a perfect fit every time. She happens to love elastic waist pants and shorts but I was trying for a more “big-girl” look with the elastic only in the back.

Start with your favorite pants pattern. Mine is Easy Fit Pants by Carla. You can purchase her patterns at youcanmakethis.com. This is my absolute favorite pants pattern and it’s the only one I use for both kids. It is super quick and easy.

Anyway, start with your pattern piece and fold down three inches. You are going to add a yoke so you don’t need the extra fabric at the top for the waistband.

Cut out two pieces, as directed. Then you are going to cut out two yoke pieces. The length is 5 inches. The width of the yoke pieces will be the waist measurement plus 6 divided by 2 (for the 2 pieces). Megan’s waist is 22 inches, plus 6 is 28, divided by 2 is 14.  So I cut two yoke pieces, 14 by 5 inches. Basically you want it bigger than the waist but not as big as the pants.

After you have the pants and yoke pieces cut out, line them all up on top of each other. Make sure all the folds are matching and everything is straight. Draw a line with a marking pencil from the where the yoke starts down. I usually start at the top and then stop at the end of the yoke material and draw a diagonal line.

Cut along the line you drew, cutting through four layers of fabric.

So, now you should have four pieces of fabric cut out, two pants pieces and two yoke pieces.

Now put together the pants as directed. You can sew everything except the top so go ahead and sew the front and back, crotch seams, and bottom hem. Don’t sew the wrong side to the right side like I did and it shouldn’t take you that long!

Sew your two yoke pieces together. Because I am using Carla’s pattern, I use a 1/4 inch seam because that is what she directs for the pants. So use whatever seam allowance your pants pattern instructs so they will line up. Iron the seams out flat.

After you do that, fold over and iron wrong side together so you have two raw edges together.

You are going to sew a casing one inch from the folded edge from side seam to side seam. Do not sew it closed.

You might have to play with the elastic length a bit. I used 3/4 inch elastic, at about 8 inches. This works out to be the waist (22 inches) divided by 2.75. I like the safety pin method of threading the elastic through the casing.

 Tack the elastic down by running a stitch at each side seam.

The last step is sewing the yoke to the pants. Just line up the side seams and pin carefully.

Sew and then serge or zig zag stitch around the raw edge. I also like to stitch around the top of the front of the pants and iron and topstitch the seam up toward the yoke. And that’s it: just like a mullet it’s business in the front and party in the back!


Fun with T-shirts June 6, 2009

Filed under: sewing — stephres @ 8:16 pm
Tags: , , , , ,

I am not normally a recon kind of girl, but I love how easy t-shirt dresses come together. Also, I was disappointed in the lack of sports wear for little girls. It seems the stores have overpriced cheerleading outfits for toddler and then unisex shirts for kids. Megan needs a girl shirt to cheer her team! Plus this way I can customize it for her extra-long frame.

I usually start with the biggest men’s t-shirt I can find on sale:

Then I fold it in half, making sure I center the design. I usually cut off the sleeves at this point to make it easier to line up:

You can use a pattern, or cut up an existing shirt. I love using Carla’s raglan pattern for this project, available at youcanmakethis.com. Pin the pattern in place.

If I am making an a-line shape, I place the ruler at an angle coming away from the side and then cut with a rotary cutter. Today I am making a gathered skirt so I fold up the pattern to just below where the graphic on the t ends. Cut out and repeat for the back.

This is what I have so far:

Now I cut off the sleeves if I haven’t already:

Now I have the sleeve from the raglan pattern but I am going to shorten it up because I am going to used the hem from the existing sleeve and I like the look of the cap sleeve with these little dresses. Just make sure you mark where you lining it up so it’s even on both sides!

Here is the sleeve cut out:


Here are all four pieces ready to go:


Sew them together. I usually pin because those edges like to curl! Serge or zig zag stitch the edges. I topstitch for a neat look.


This is what it looks like all sewed together.


I have experiemented with different sleeve options and I really like elastic in the sleeves. The hem on the existing shirt makes a perfect casing for 1/4 inch elastic. I just measured Megan’s arm loosely for the length of elastic. Insert it in and tack at both sides.


Here is what I have so far:


Sew the sides, starting with the edge of the sleeves. If the bottom doesn’t perfectly line up I just trim it so it’s even. I make a rectangle out of the remaining t-shirt and run a long gathering stitch around. Then I pin the rectangle to the bodice, pick at the gathering stitches and sew into place.


Sew in the collar, this is the most stressful part for me. Just take it slow and be careful and you’ll be fine:


You make have noticed I used the existing hem whenever possible. It takes some practice to sew knit hems perfectly straight and I tend to cheat whenever possible. Another way to cheat is to do a lettuce hem. Set your machine on a narrow zig zag and pull the edge tight from front and back while sewing around the edge. I go around twice for a nice thick hem:


Here are some more examples, I hoped you enjoyed it! Megan wears these over jeans and as nightgowns too.


A Quick Sweater Reconstruction March 4, 2009

Filed under: sewing — stephres @ 8:51 pm
Tags: , , , , ,

I can’t believe this is a year old! I attempted my first reconstruction last year and wrote a little tutorial about it. It was a little hard to find because apparently Teresa did not find it helpful enough to bookmark (insert snooty here), but I thought I would share it anyway. I cannot just envision what I want to do and start cutting and sewing to make it happen, so this worked perfectly for me because it was half pattern/half winging it. Also, if you are prone to shrinking your sweaters, it is a great way to get use out of them (providing you have a smaller person to wear them).

So I took a sweater that was too short for me and a t-shirt pattern:

Photobucket

I laid the pattern on top of the sweater and trimmed the sides. I left it long because Megan is cursed, er I mean blessed with a long-waist like me and extra length is always appreciated. Also, I didn’t have to worry about hemming the bottom of the sweater. This will give you a tunic sized top or a dress if your little one is very little.

I sewed the sides back together (and serged). I took the sleeves and wrapped the pattern around and trimmed. You are going to want to wrap the sleeve pattern around the sleeve as best you can and pin and then cut. You can make them longish or shortish, whichever you prefer. I left them longish for my monkey-armed kid.

And then I sewed the sleeves back on. Be careful to match the seams and don’t pull too much or it will be bunchy. I serged the seam. Voila! A little girl sweater!

When you are picking a sweater, I found the slight v-neck style gives the best result and looked like it fit the kid, as opposed to being too big and gaping around the neck. I asked a friend if it looked hand-made (my fear with recons) but she assured me it looks like I bought it from Gap (yay!). And since I made it roomy and long, it still fits her this winter!


Father/Daughter Dance February 7, 2009

Filed under: sewing — stephres @ 8:09 am
Tags: , , ,

img_1125

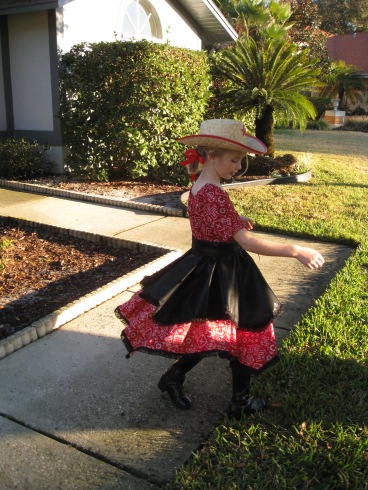
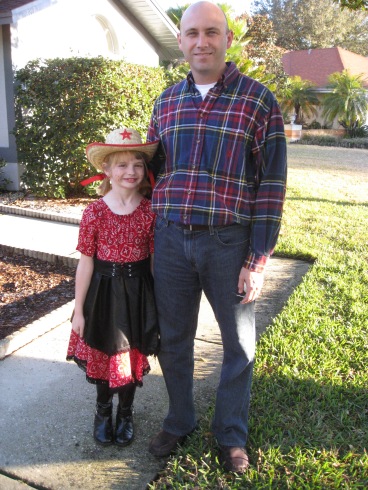
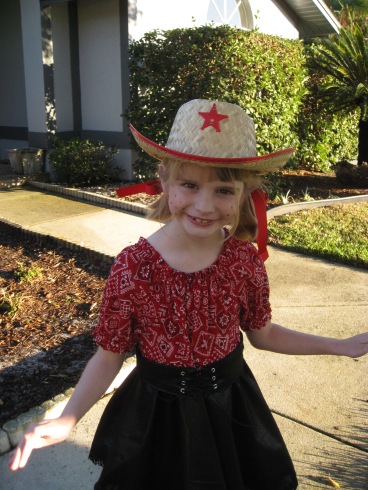
Now that I am sewing, every special event is an occasion for a new outfit. The Father/Daughter Dance at school is no exception and Megan had fun picking out what she wanted. I had a costume pattern, but changed it a little so I could make the top from Carla’s peasant top pattern. Really, there is no reason to make a commercial pattern with bias tape when hers is much simpler and faster. It came together pretty quickly and Megan was very pleased with it. We were going to do blue gingam, but she had these black boots so I talked her into red and black. Plus, I really like her in red!

I do have to say with the amount I spent on fabric, lacing, fringe, eyelets and interfacing; it would have been cheaper to buy a costume. But it wouldn’t have been hand-made with love, right? And it definitely would not have fit properly, which I am proud to say, this outfit does.

She does not like the hat, however, so I am sure she did not wear it after the pictures were over. And she wanted make-up, so I gave her a little blush and freckles with my eyeliner pencil and of course, lipstick. I am sure they had a great time, I can’t wait until the get home to hear all about it!

Aren’t they cute?

img_1124

img_1127